
Do you want the real Wawa experience? Well then, there’s only one way you can read your Chinuk Pipa: as a physical booklet! Follow this guide to get your own copy of the Kaltash Wawa.
Materials
- Printer (a colour printer is best)
- Paper
- 1 piece of Card Stock per booklet
- Stapler & staples
- Paper trimmer (scissors could work too)
- A piece of cardboard (preferably rather thick, or if thin then multiple pieces)
- Adobe Acrobat Reader
- The Kaltash Wawa PDF

Instructions
1. Download the Kaltash Wawa PDF file
2. Load paper
You will need to load paper into your printer with your one piece of cardstock sitting on the top – this might vary by how your printer works though. The goal is to have the cardstock become the cover of your booklet, so load the cardstock wherever your printer prints the first page.
3. Print
To get the proper print settings you will need to have “Adobe Acrobat Reader” installed. It’s possible that there are other programs that work, but I do not guarantee that they will and will not guide you through them.
So, the first step is to click the print icon:
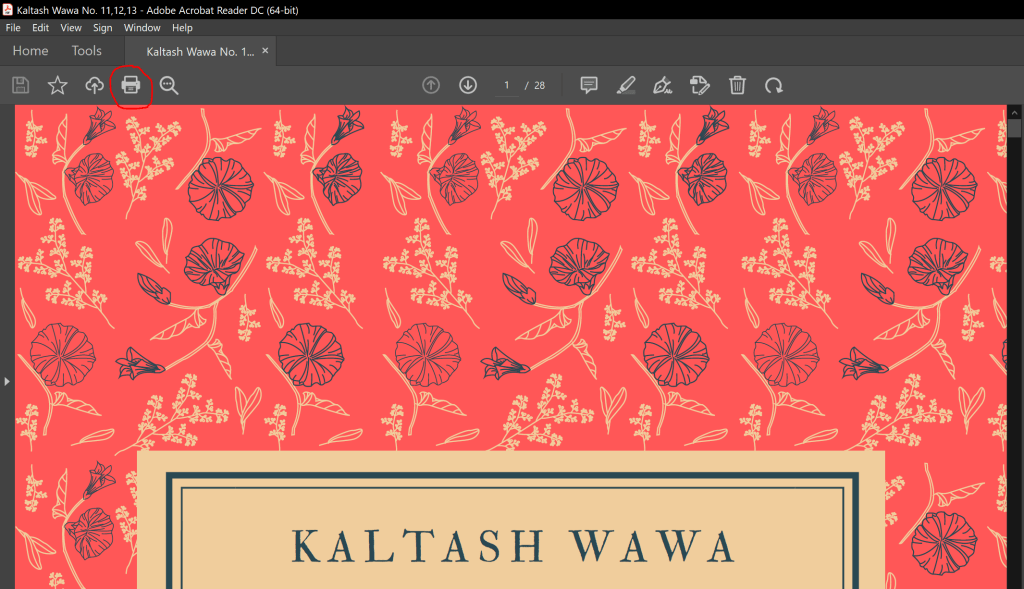
Make sure that you use the “Booklet” setting and print on both sides.

Depending on your printer you might have to reload the paper in the proper orientation after it has printed on one side so it can print on the other. Your printer should give you instructions for how to do this.
4. Trim the paper
The edges of the paper will remain white – you should take your paper trimmer or your scissors and trim this white part off. A paper trimmer (that thing that looks a bit like a little paper guillotine) works best to get straight lines and to be able to trim many sheets at once.
If you like and depending on the type of paper you are using for your cover, you might choose to score it on the spine so that it folds better. I didn’t do this, but you may find it works better for you. There are special tools called “bone folders” people use for this, though you can use anything from the blunt side of a butter knife to a dull pizza cutter. Basically you just run a blunt knife-like tool along the spine so that you get a bit of an indent (but not a cut!).
5. Bind with staples
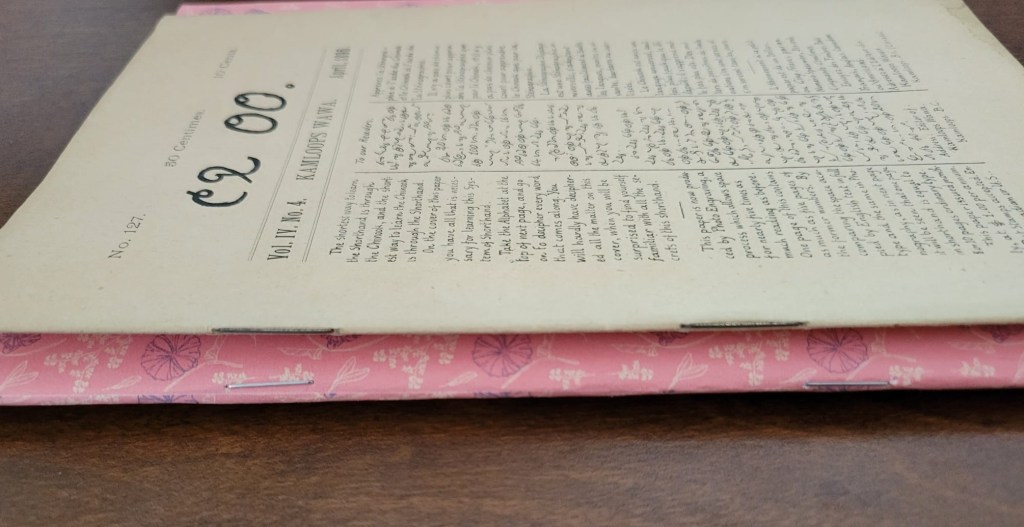
Now at this point you may be looking at your paper and wondering how your stapler will reach the centre. Personally I have a tiny stapler which had no chance of reaching. Well this is where your piece of cardboard comes in handy!
Take all your trimmed paper and get it into a stack with all the pages in the right order. Then lay it down on the cardboard with the cover facing upwards. Unhinge your stapler and carefully staple the paper to the cardboard twice along the spine. Make sure your cardboard is thicker than your staples are long (your table will thank you). Then carefully pull the booklet up off of the cardboard – the staples should remain in the paper, but come cleanly out of the cardboard. Then simply bend the staples down (I used a pen to do this) and your booklet is now bound! Fold the booklet along the spine and read away.
If you need more of a visual guide, I found this video helpful for binding step:
Any questions? Let me know in the comments and I can try to help you. If you’d like, you could repeat this process to make yourself a copy of Hansel and Gretel as well!
